Pay $0 on all credit card transactions and save 90% on your monthly processing costs
Learn more
Please follow the steps below carefully. Each step is required, and skipping or altering any part of the process may cause the integration to fail. For the best experience, complete the instructions exactly as shown.
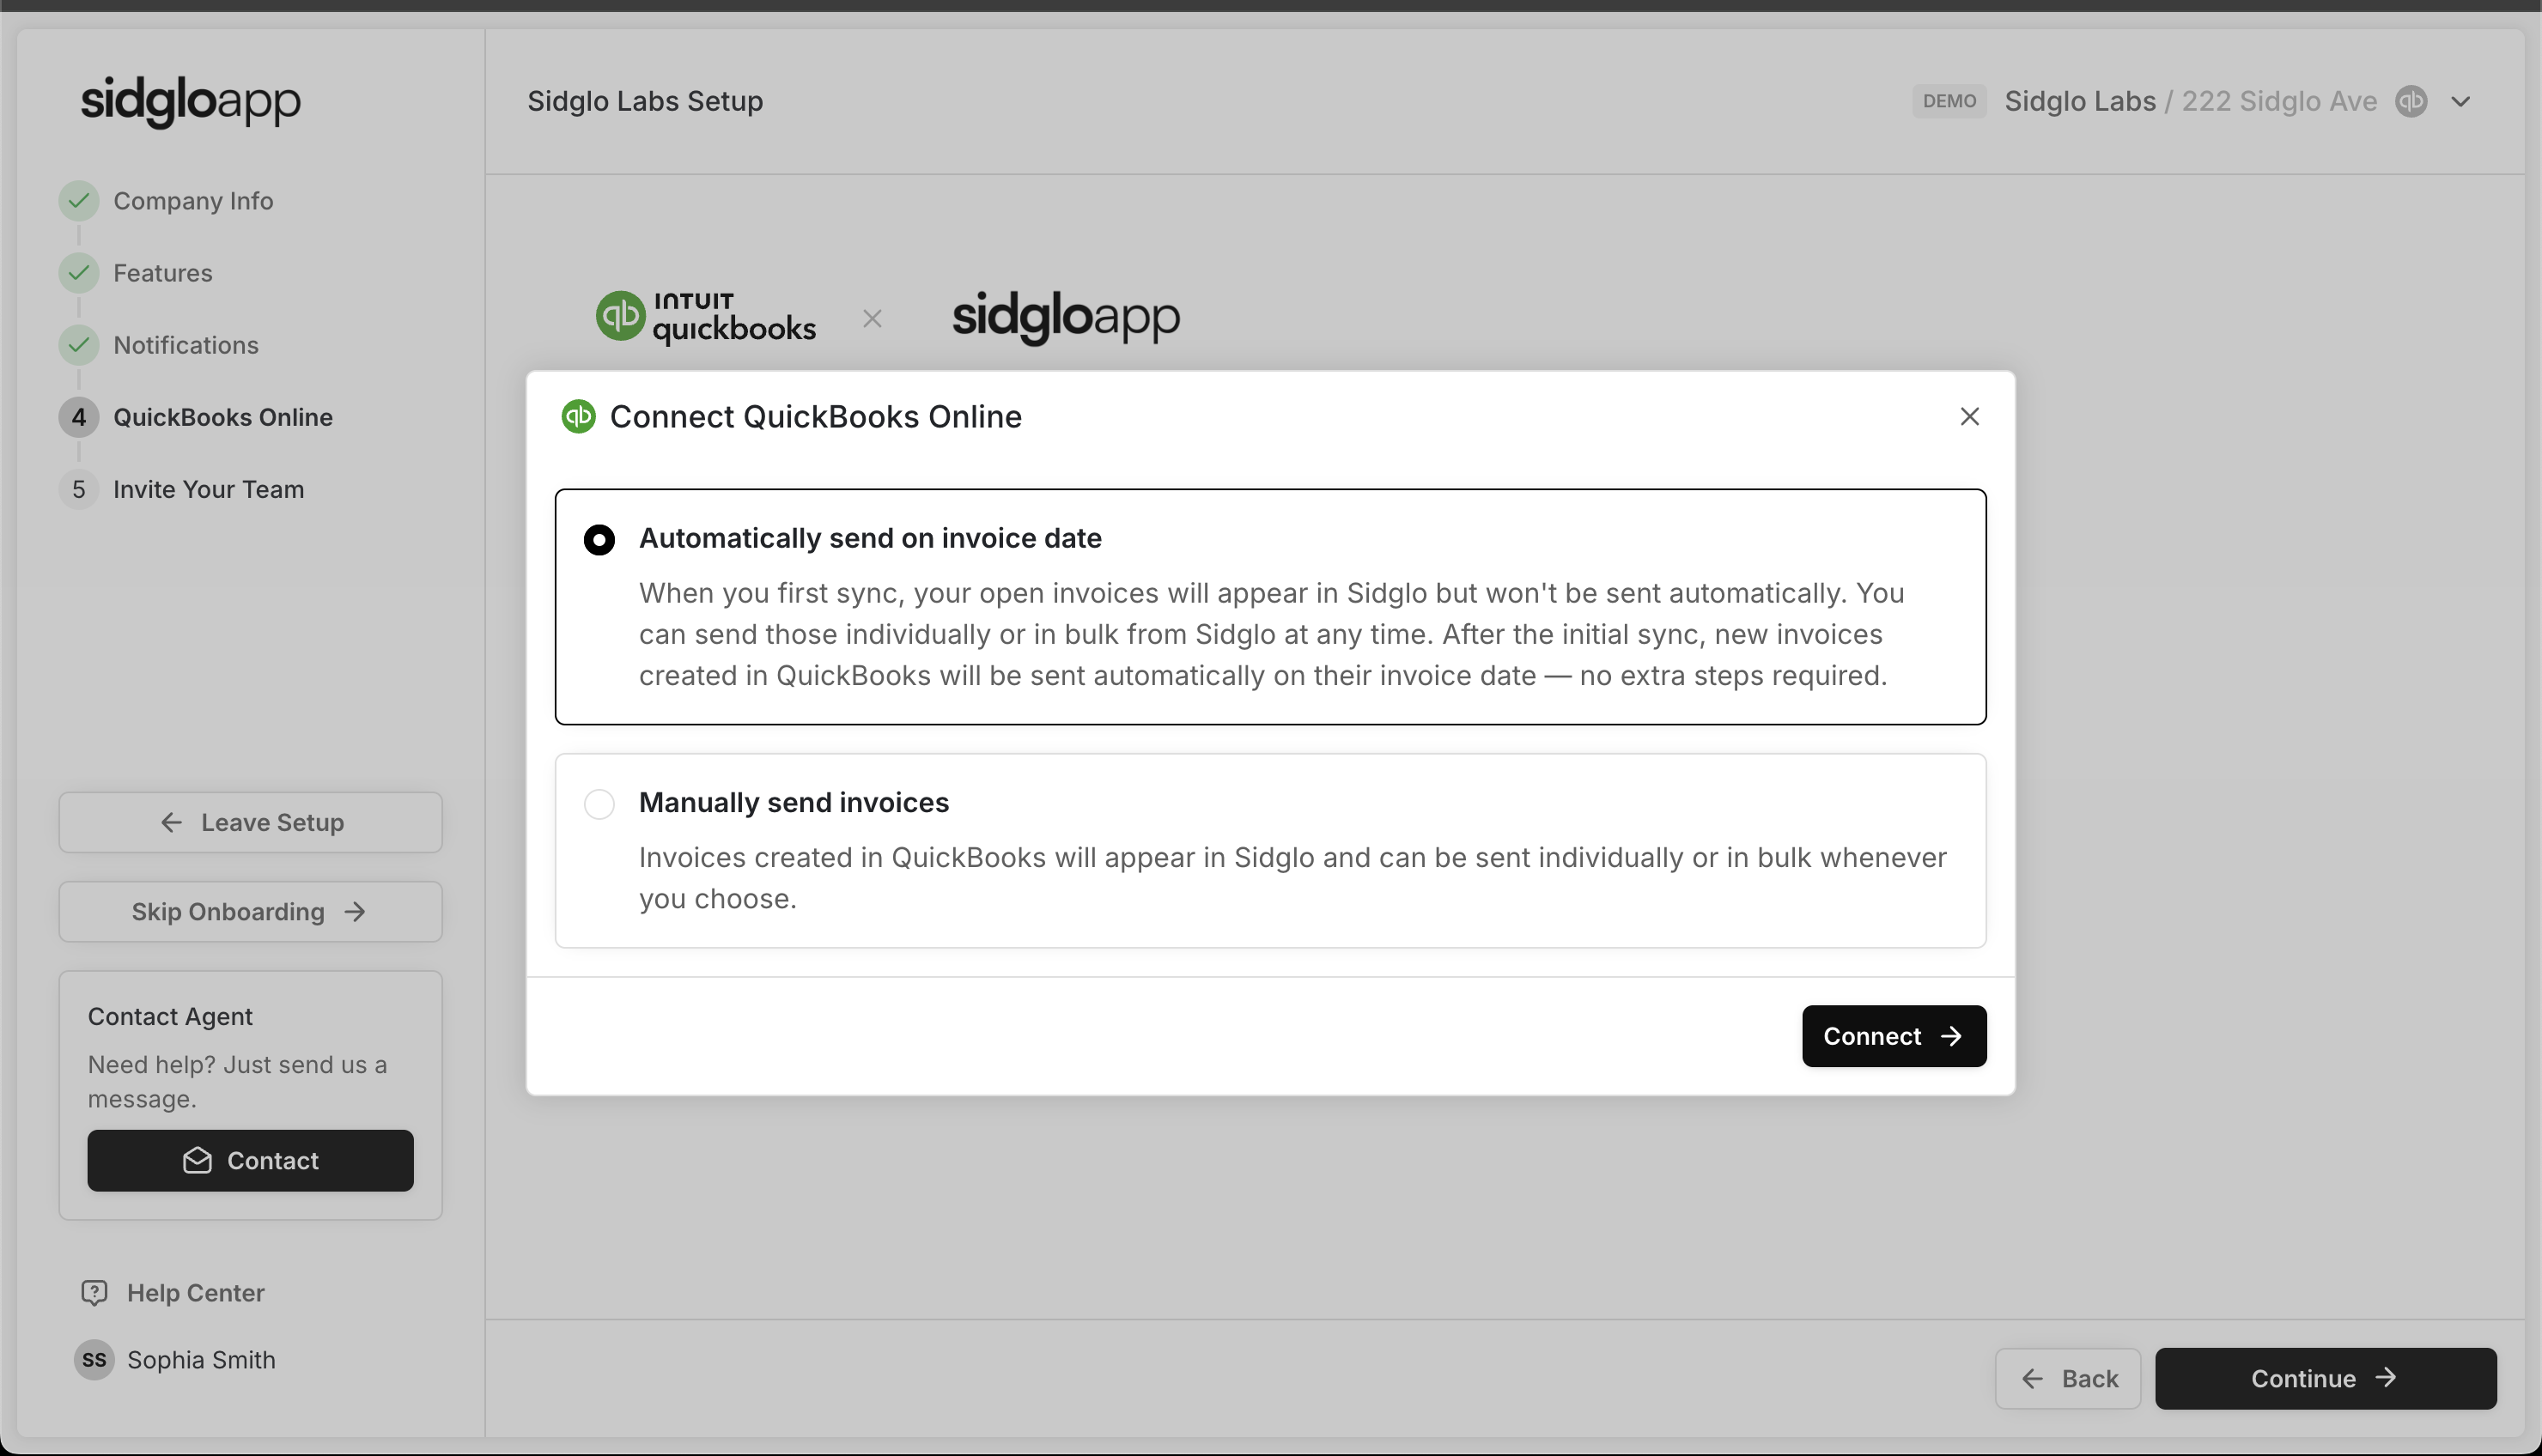
To begin the integration, select the "Connect QuickBooks" button in your onboarding tab. This will launch a secure pop-up that starts the connection process with your QuickBooks Online account.

For the best experience, we advise sending invoices directly from Sidglo App. If you choose to create them in QuickBooks, selecting "Automatically Send Invoices" will also ensure they’ll still go out without delay.

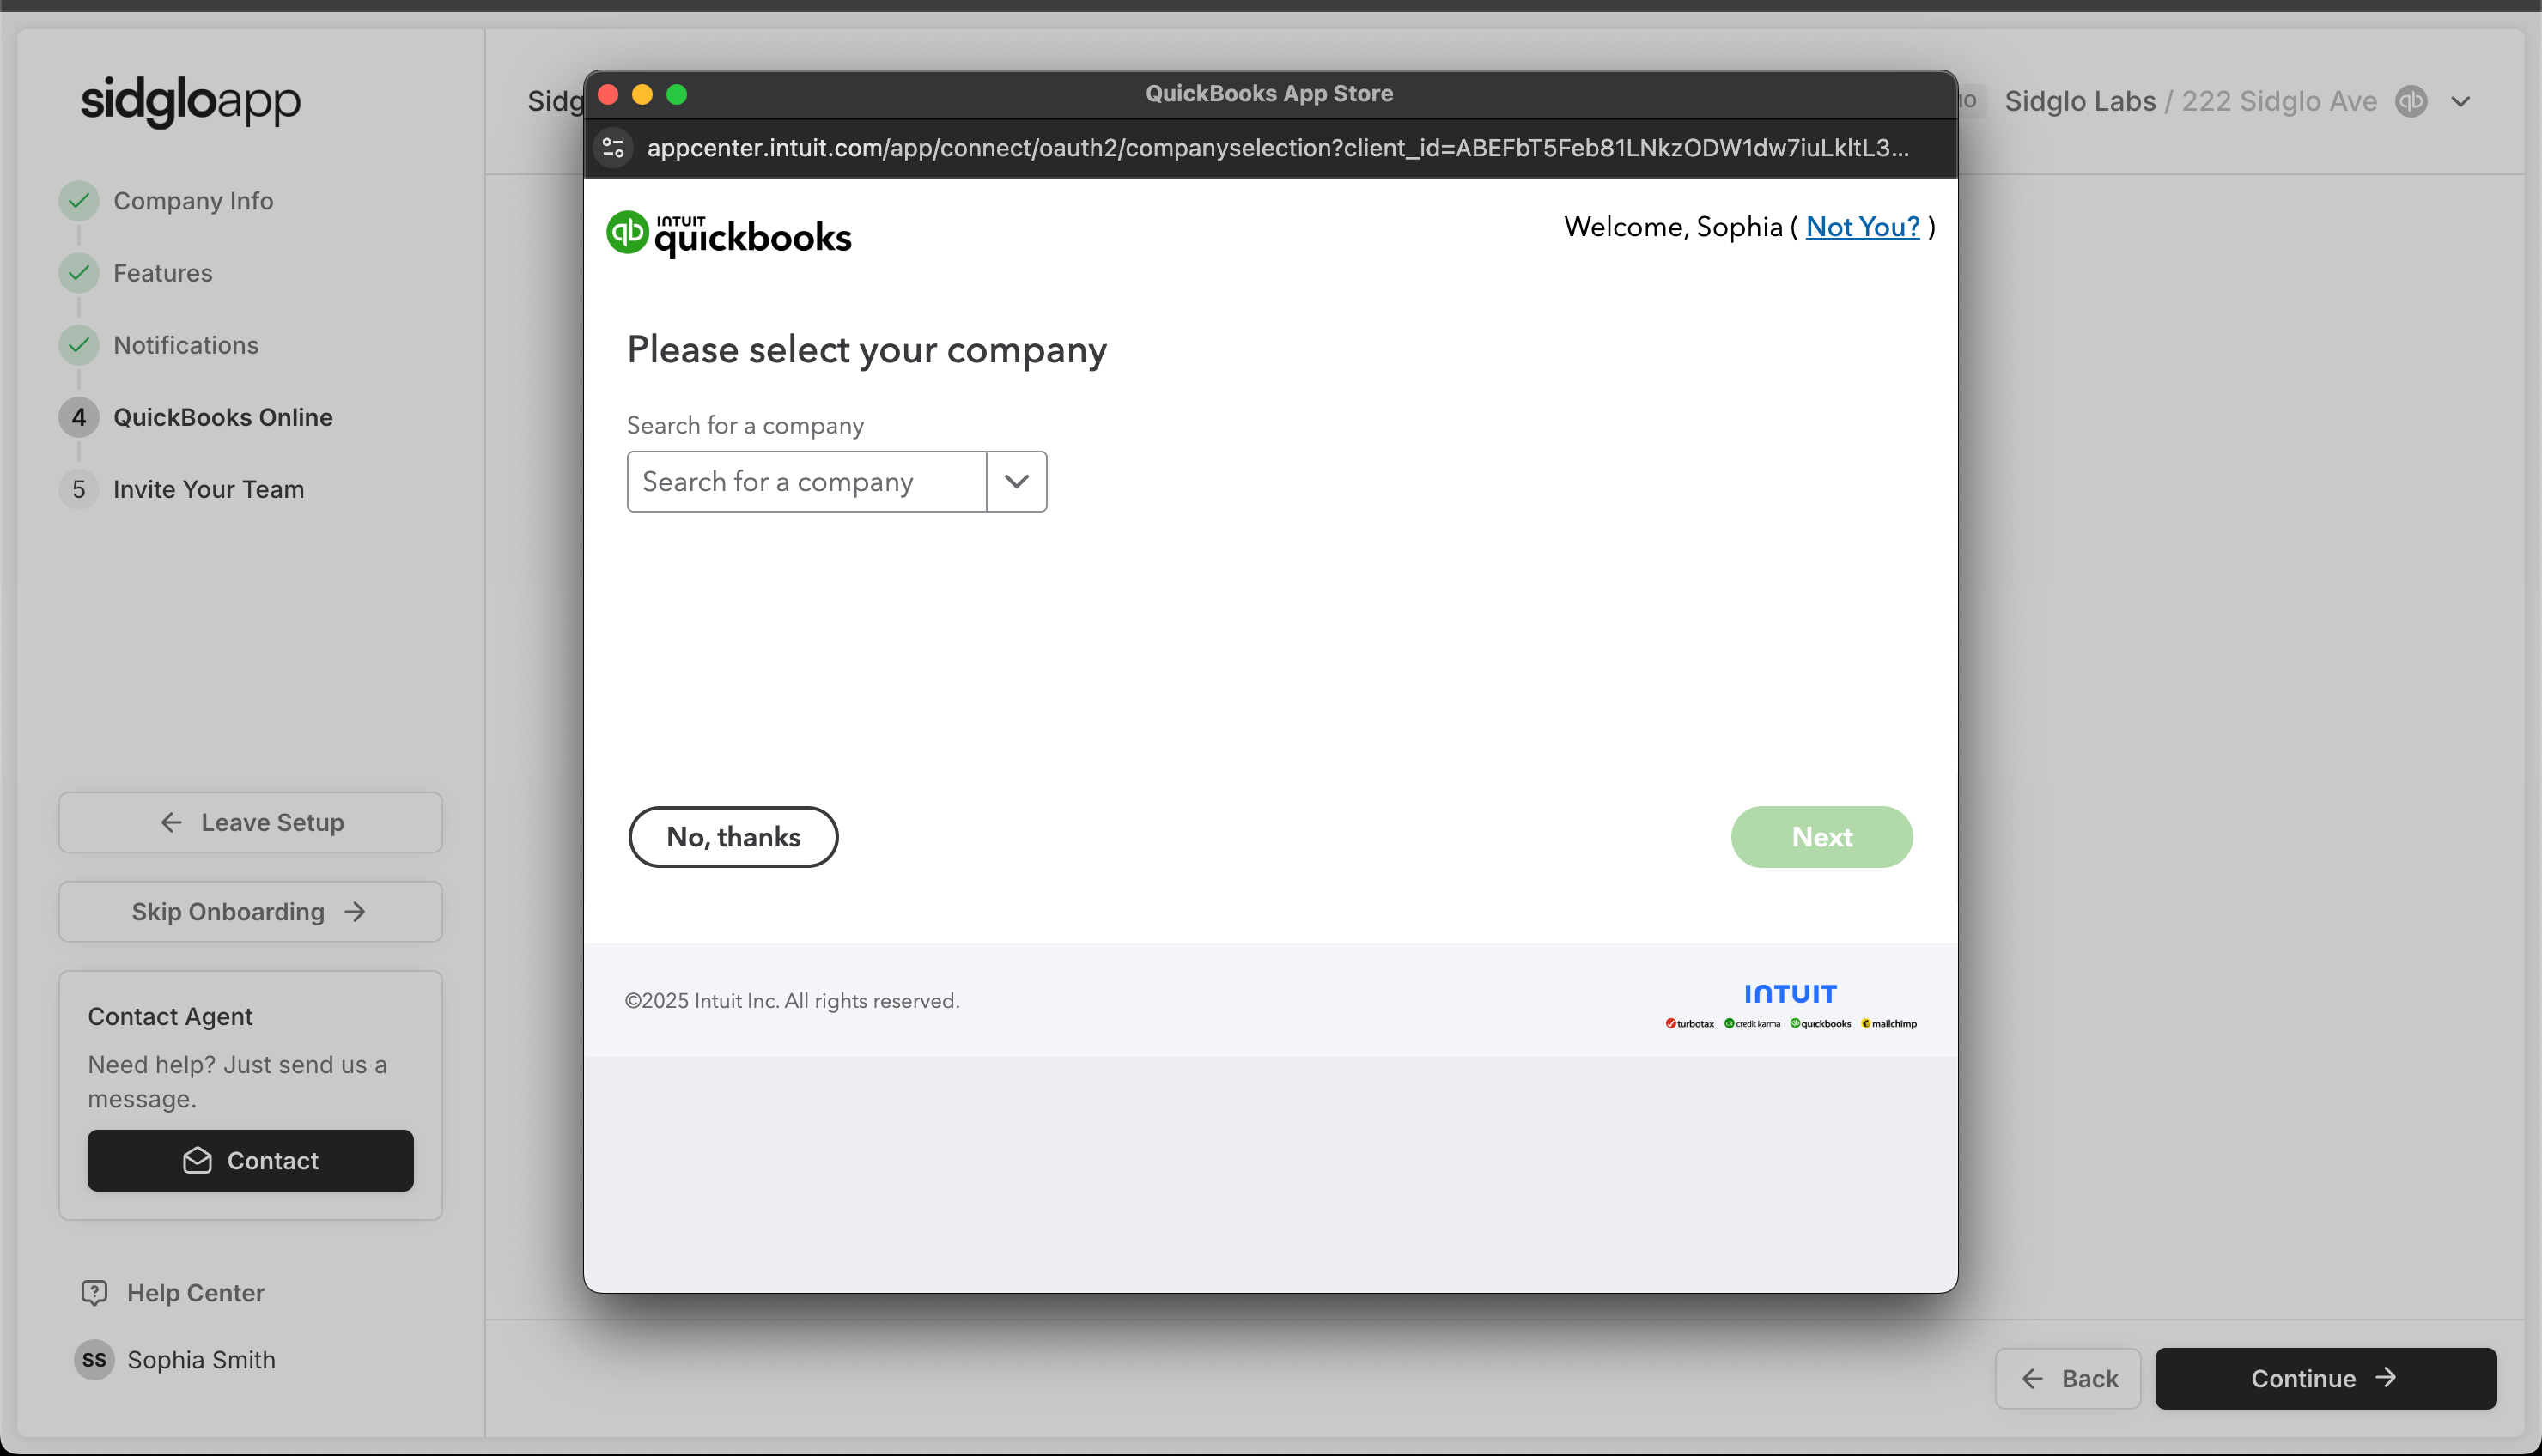
If you have more than one QuickBooks account, simply select the account that you want to integrate from the dropdown and press "Next".

Finally, authorize the integration by selecting "Connect".

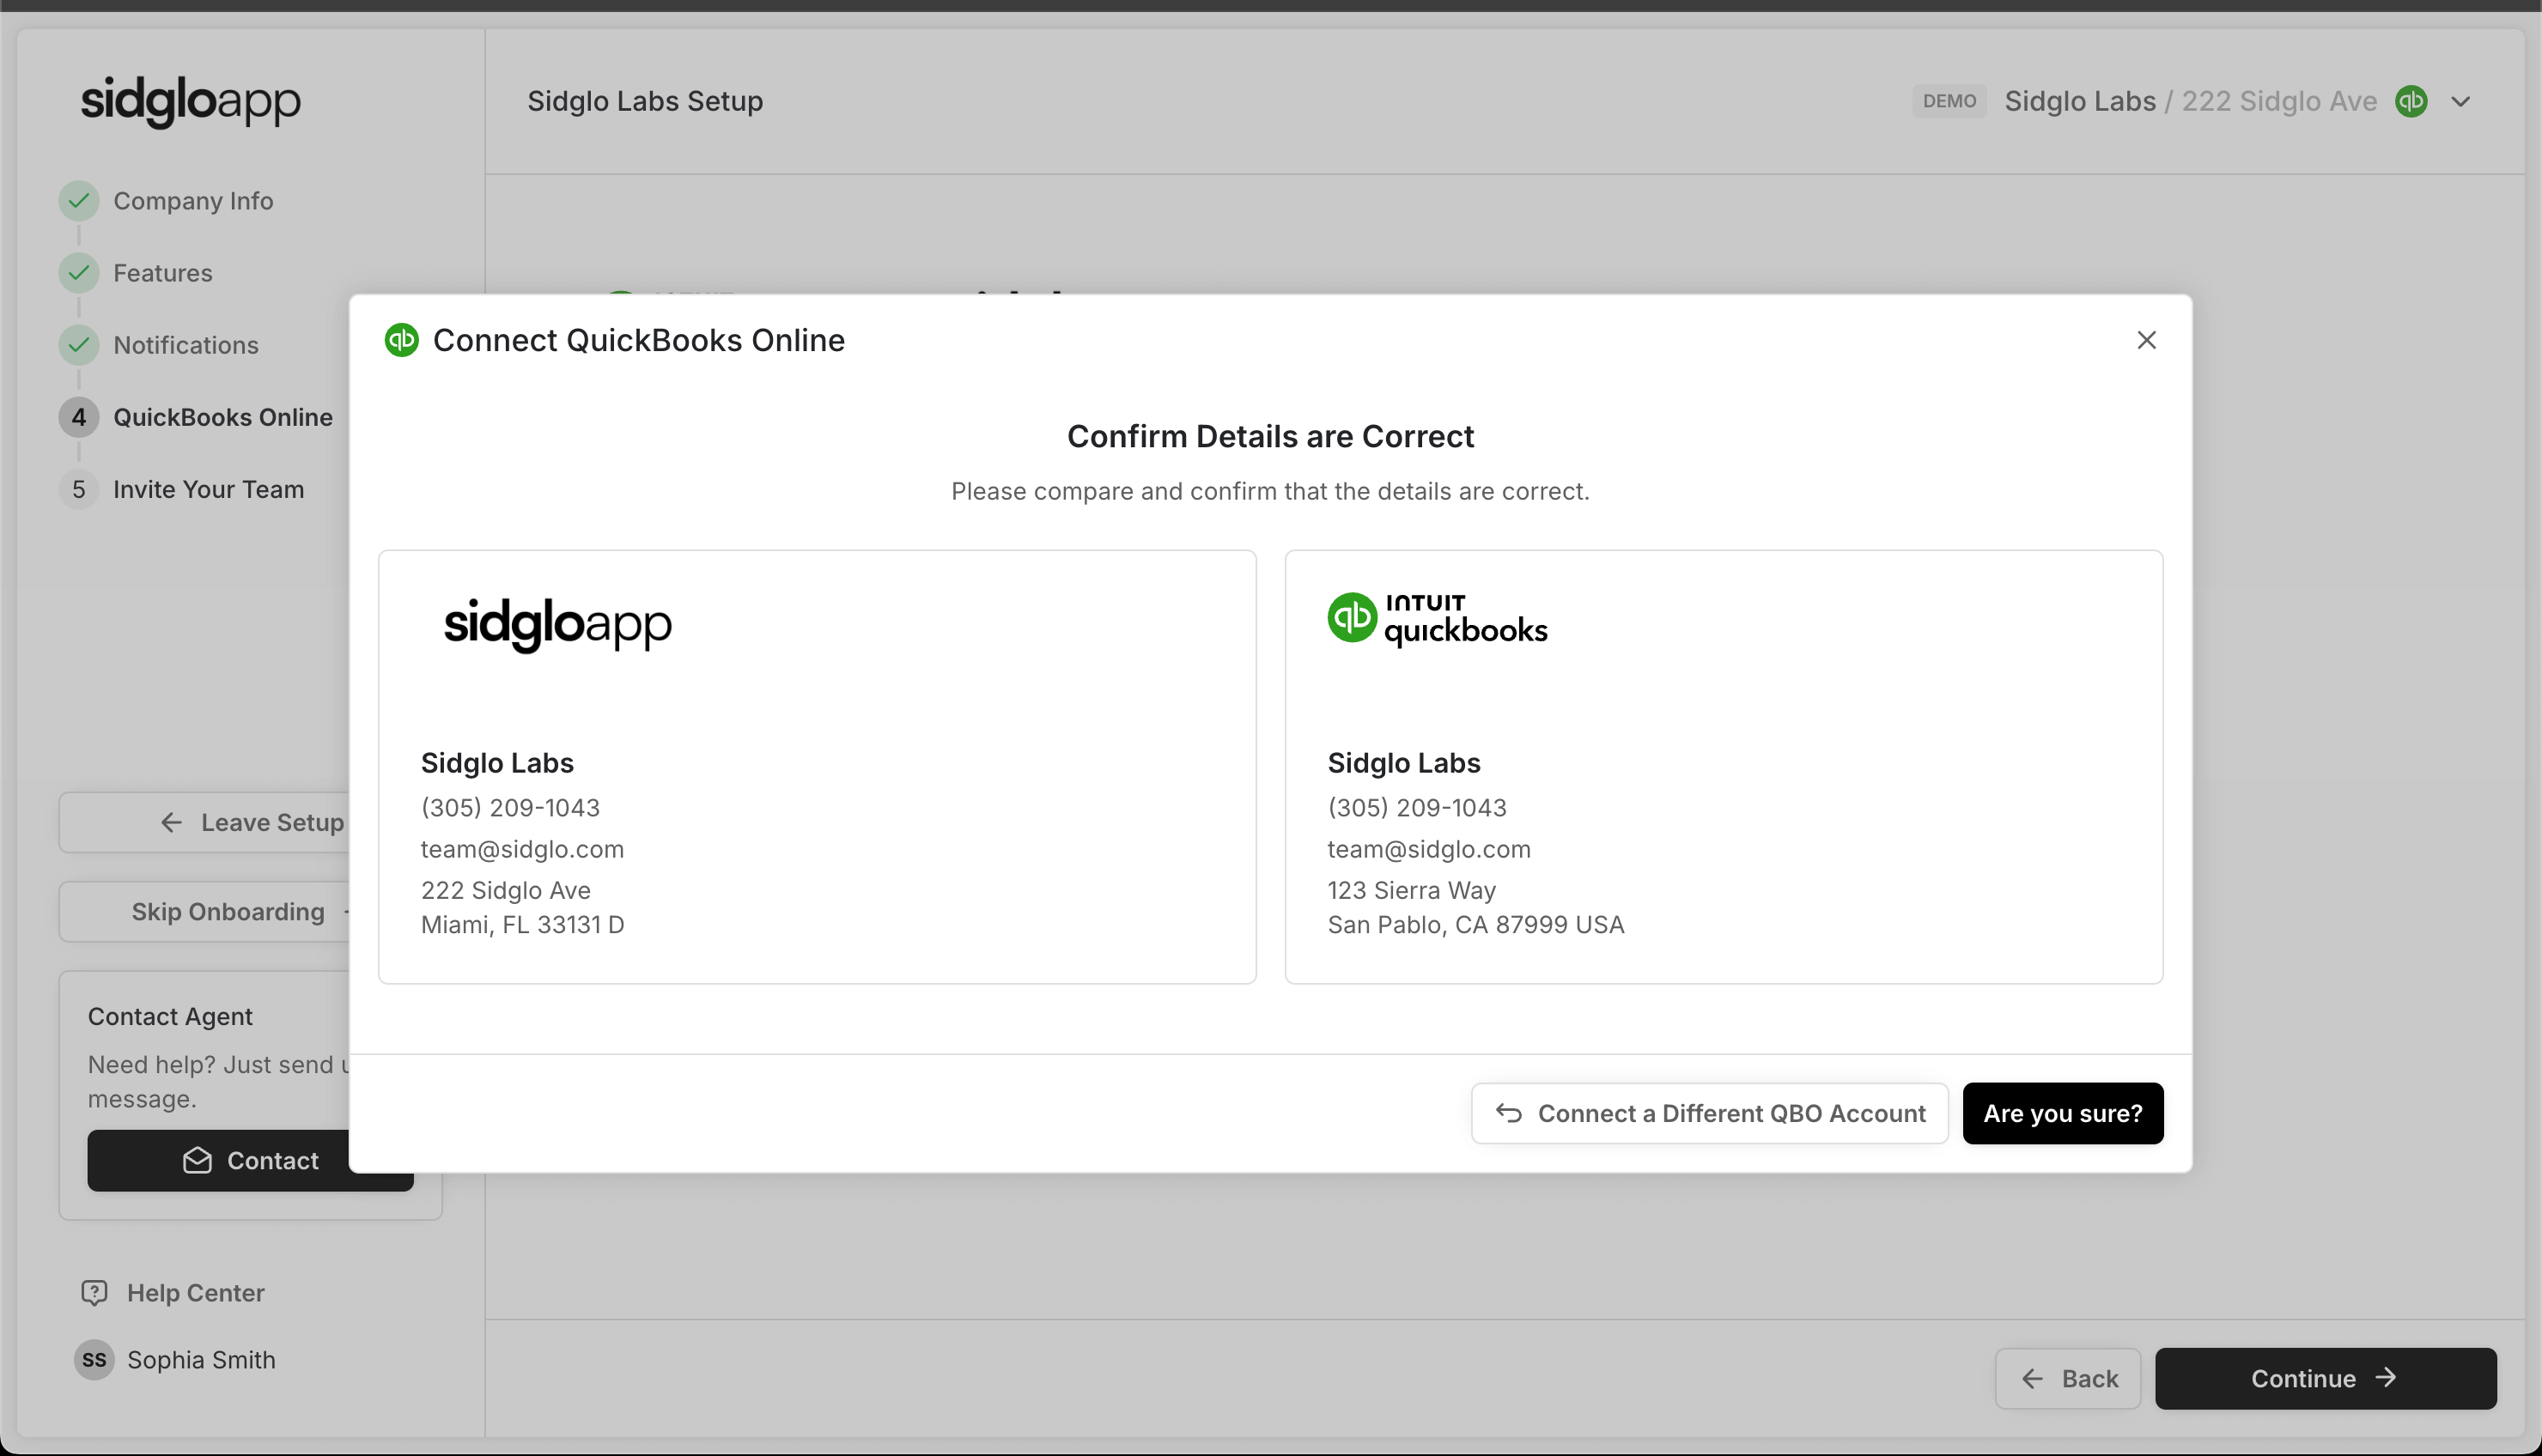
Take a moment to make sure the correct QuickBooks company profile is selected, then confirm to proceed. This ensures your data syncs to the right account.

For the smoothest experience, and to ensure everything works perfectly, always send invoices directly from Sidglo App.
If you choose to create and send invoices from QuickBooks instead, always select a “Save” option (Save, Save and New, or Save and Close).
Never click “Send” as that bypasses our integration and uses QuickBooks’ native delivery system. Stick to this protocol, and your invoices will send correctly every time.

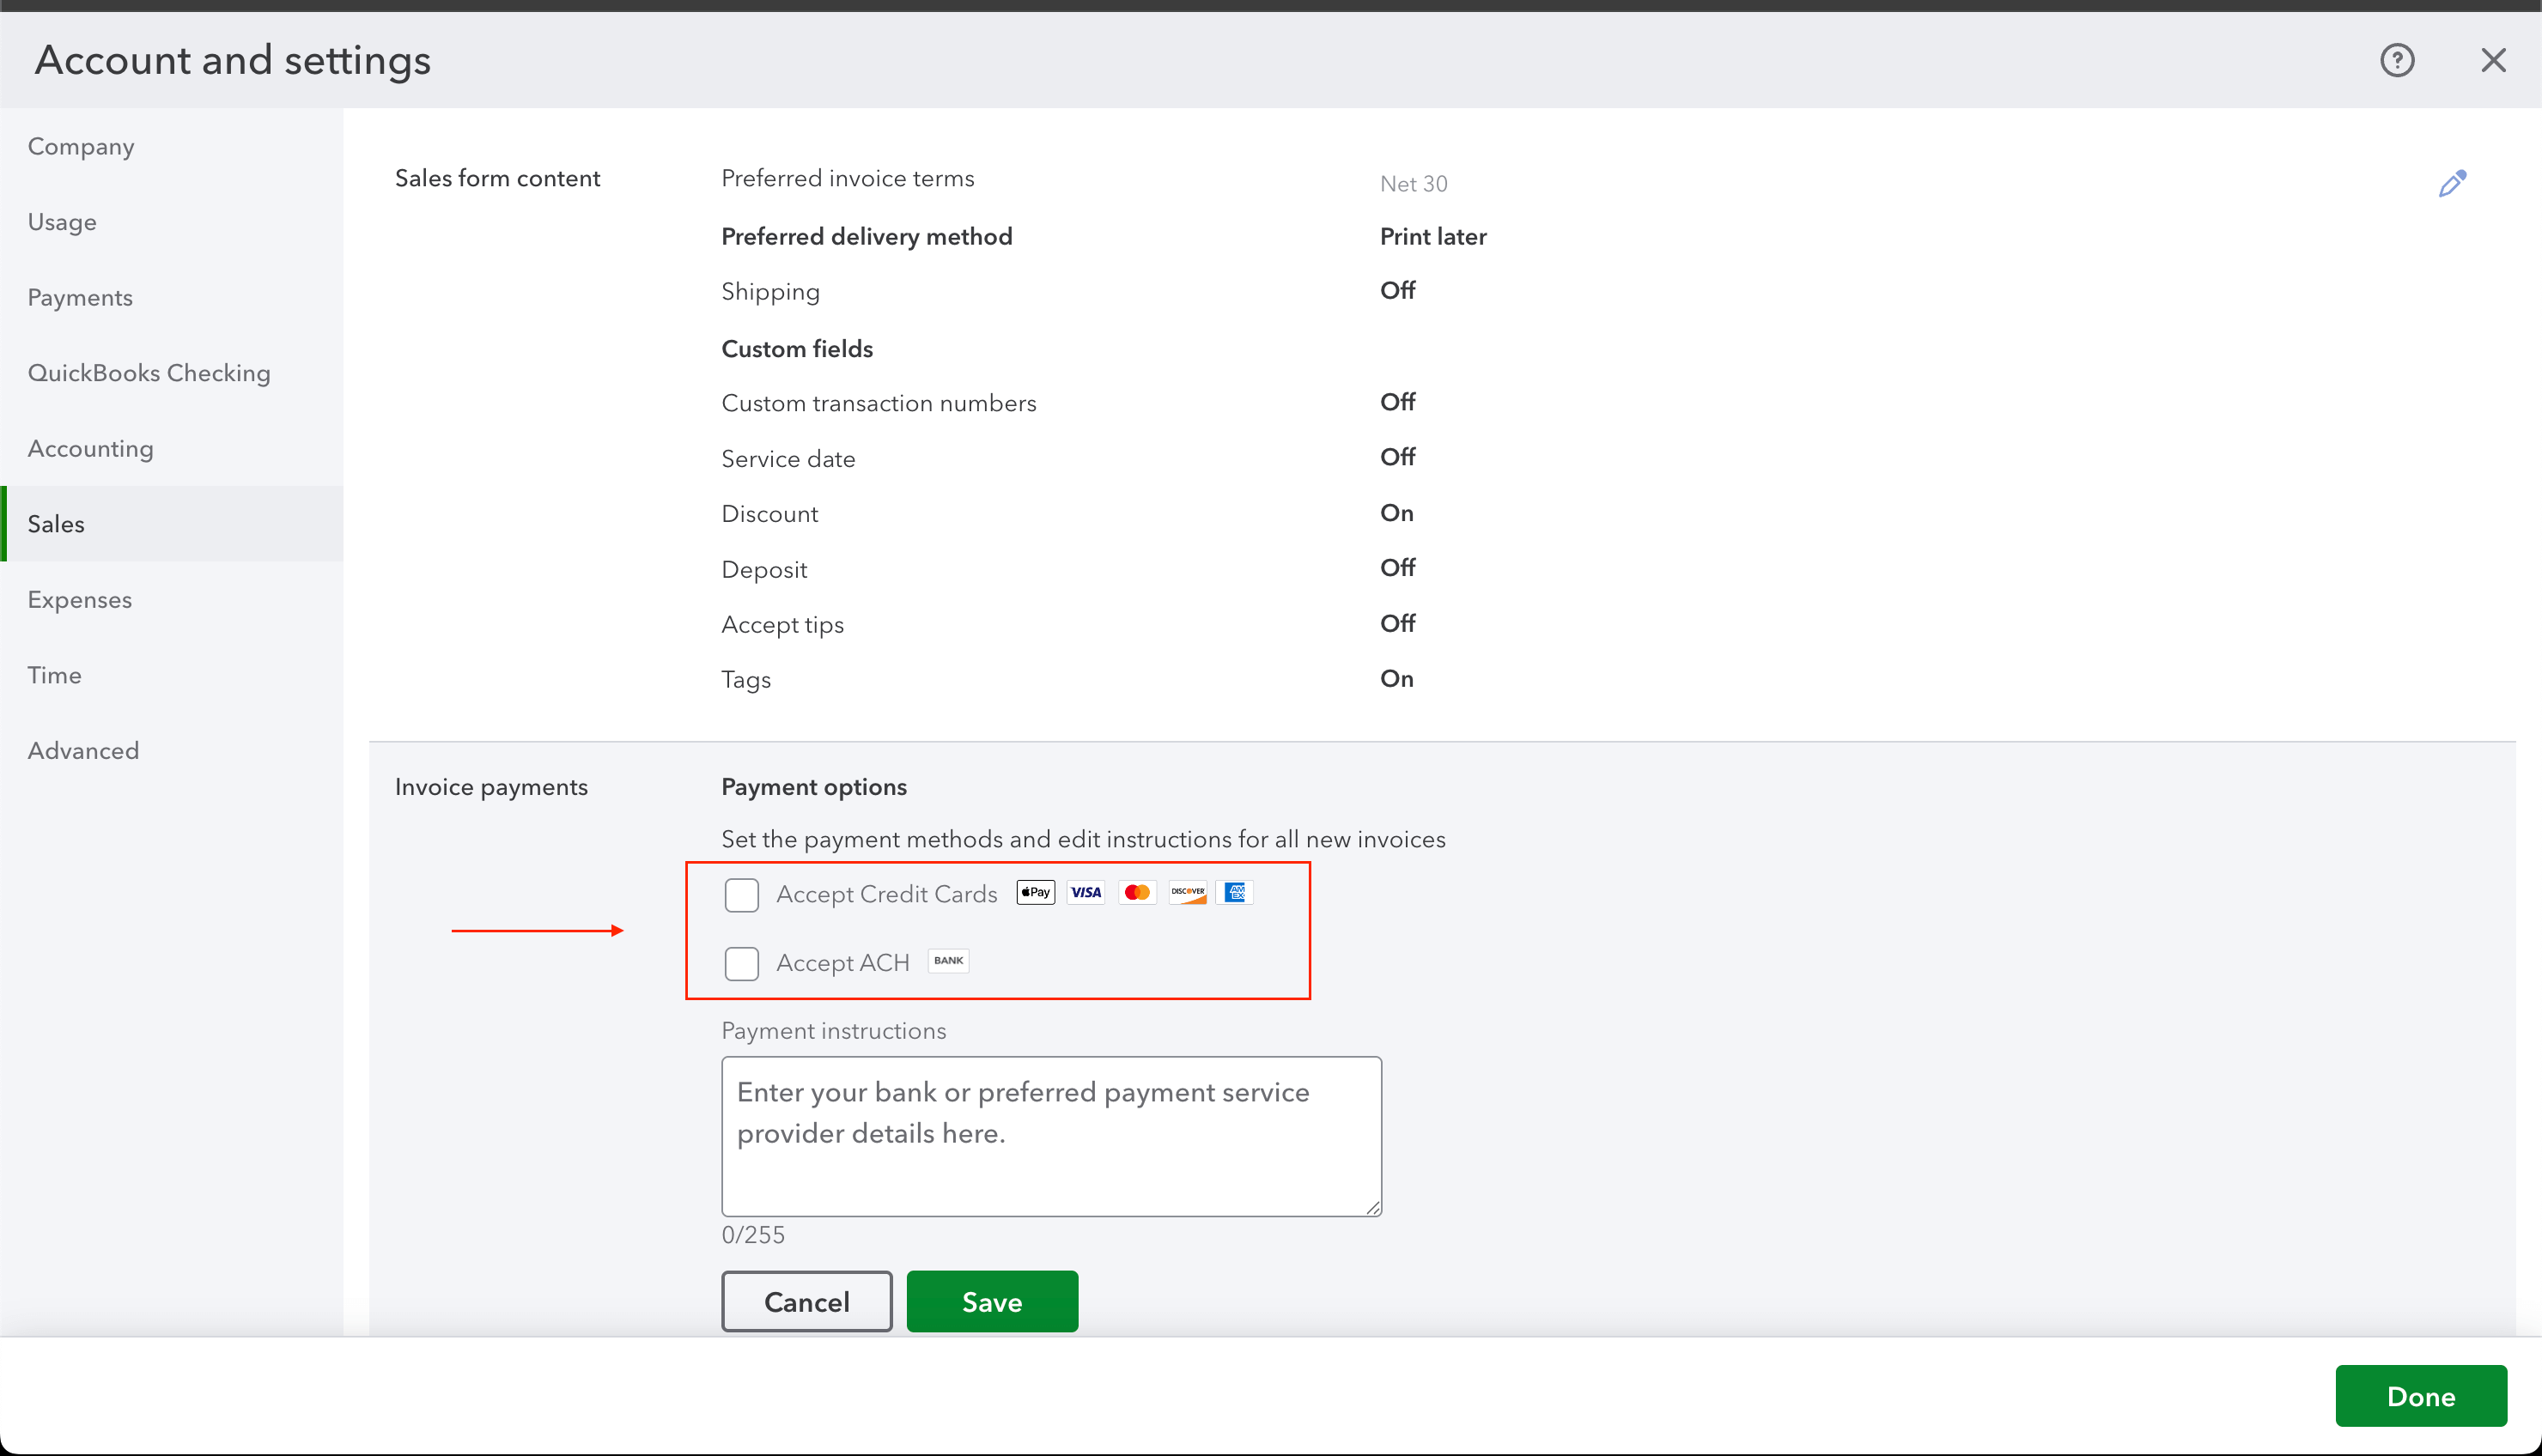
After completing the integration, log in to your QuickBooks account and turn off QuickBooks’ built-in payment processor.
Go to Settings → Account and Settings → Sales, then scroll to Invoice Payments and toggle it off. This ensures your invoices are processed through Sidglo and not routed through QuickBooks’ internal system.
You are now ready to finish your onboarding.

If you have questions or require immediate assistance please don't hesitate to reach out!